 We have all the supplies, now it's time to felt! I loved every second of this class! Really! Come see what we created during this past weekend's workshop, Introduction to Wet Felting! I've always wondered about wet felting. I've "felted" before, but that was because I mistakenly put a wool hat in the washing machine. Instead of fitting my head, it now fits a child's head! I follow felters thru social media, Jenny Hill from J. Hill Felt (jhillfelt.com/), Joyce Mynoush from Mynoush Art (mynoush.com/) but I've never tried the craft...until this past weekend!
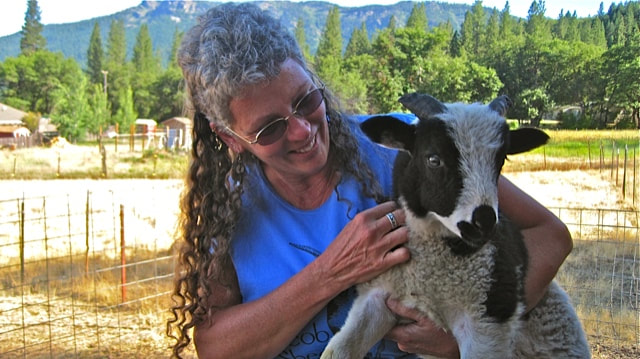
My friend, Lorraine Nielsen, Shear Bliss (www.fourwindswool.com/shear-bliss.html) is a fiber artisan who creates handspun yarns and wool products of natural color or with natural dyes. Her respect and awe of wool and of the craft of spinning was launched at a spinning class she took in 1975. She has since cultivated a passion for all fiber arts, including felting with wool from her own flock of Jacob sheep. 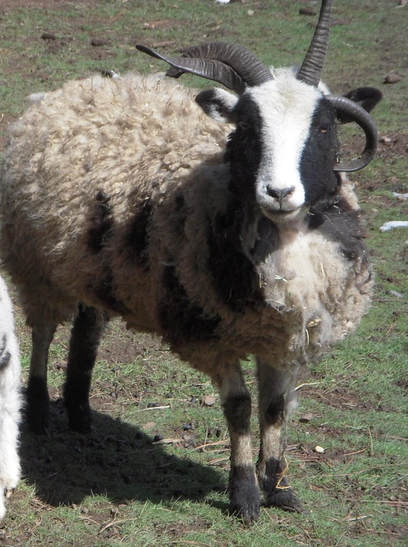 My friends, meet the "other" Zuzu! Jacobs are a multi-horned breed with sheep having two, four, and on a rare occasions, six horns. The breed produces a medium fleece that is light and open, with a staple length of four to six inches and a weight of three to six pounds. As a result, it is much sought after by fiber artisans, who enjoy its characteristics and color combinations. The American Jacobs are an old world sheep which, unlike many other old world breeds, have not undergone "improved" breeding to satisfy the commercial market place. I was beyond excited when Lorraine agreed to teach a felting class. Excited because I had a chance to learn something that I've always wanted to do, and excited about the opportunity to have others join!
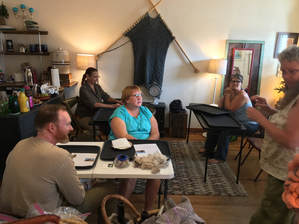
Lorraine had just returned from the Annual Jacob Sheep Breeders meeting in Vacaville, so instead of bringing us roving from her flock, she surprised us with bags of beautiful grey and white roving from Meridian Jacob Farms. To be more specific from "Madelina." I just love knowing that Madelina provided us with her wool to work with! After a discussion on the materials we were going to use, we were ready to get our hands wet. . .literally! OMG, I'm so excited to start!!!
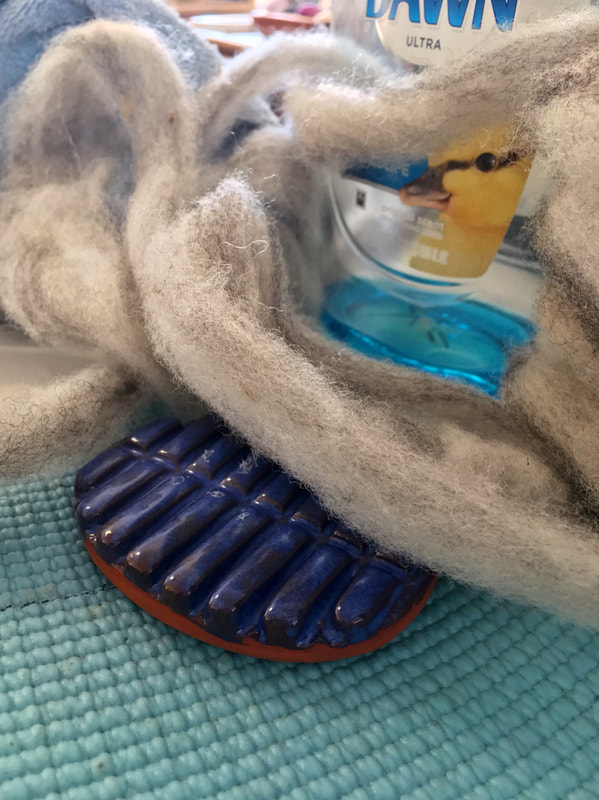
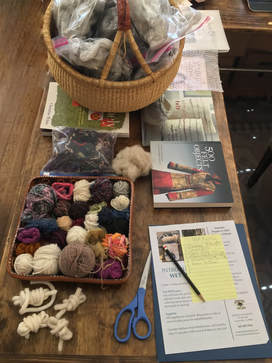
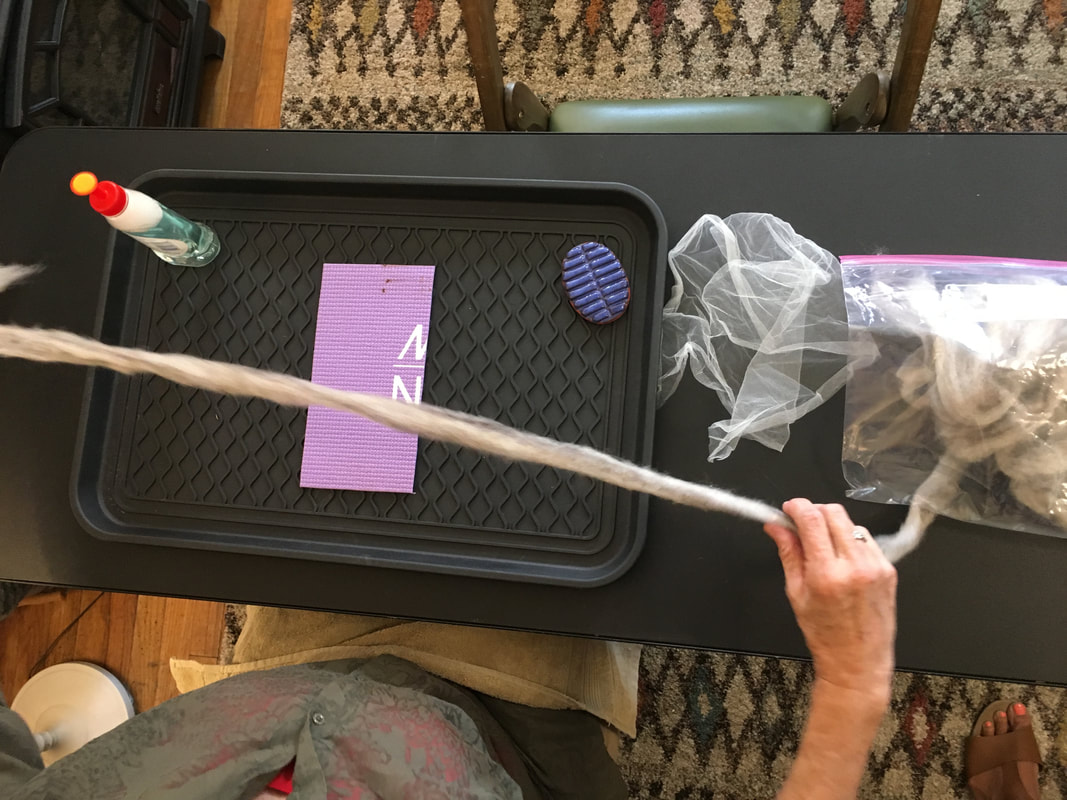
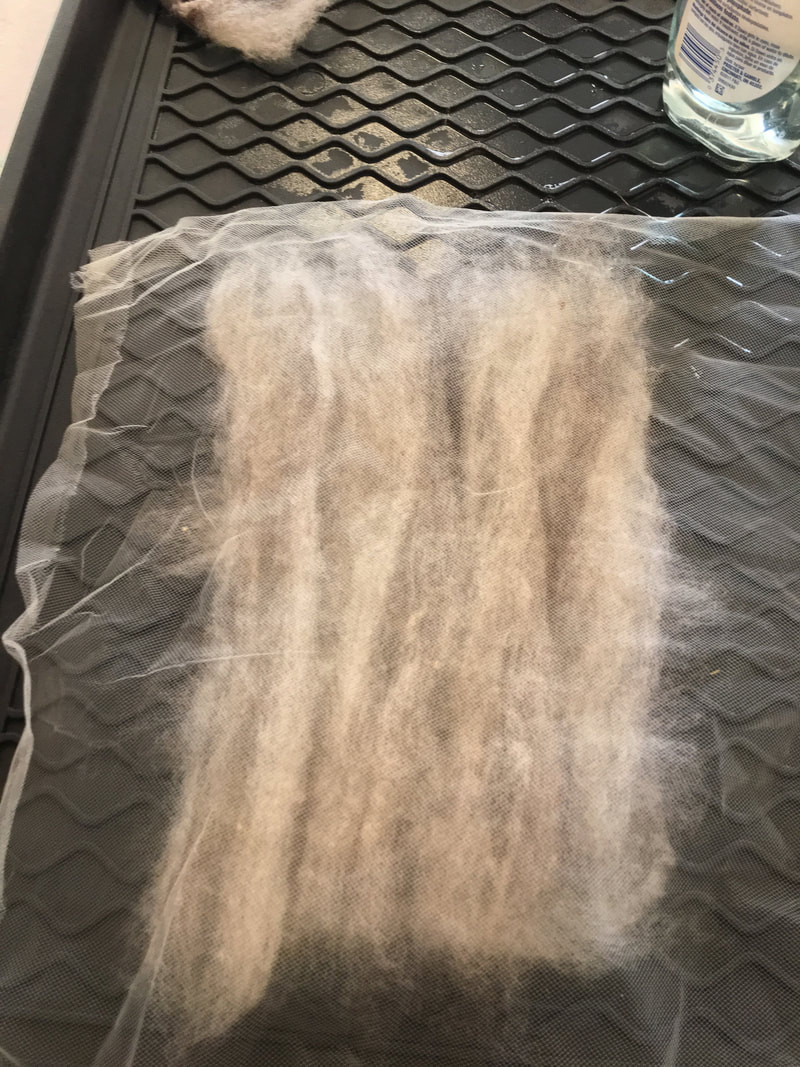
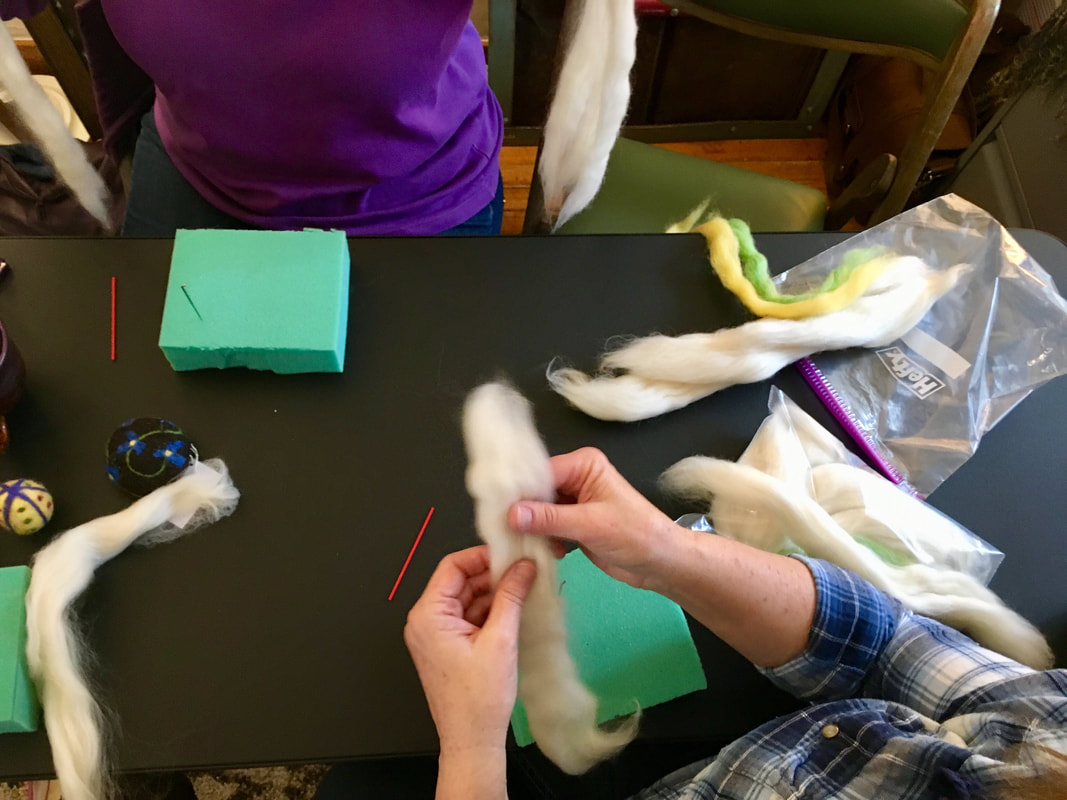
Our first step was to create the cord or strap for our bag. We measured out a length of roving, stretching it between our hands, the length of our arms. And now the hard work! We wet the material with soap and water, then rub the roving between the palms of our hands. Moisture, heat and friction cause the roving it to shrink considerably in both directions and become compact and solid, creating a perfect cord! To create the pocket of our bags, we felted around a "resist." A resist is a barrier which keeps fibers from felting together. And in our case, the resist we used was a piece of yoga mat cut to a specific size. 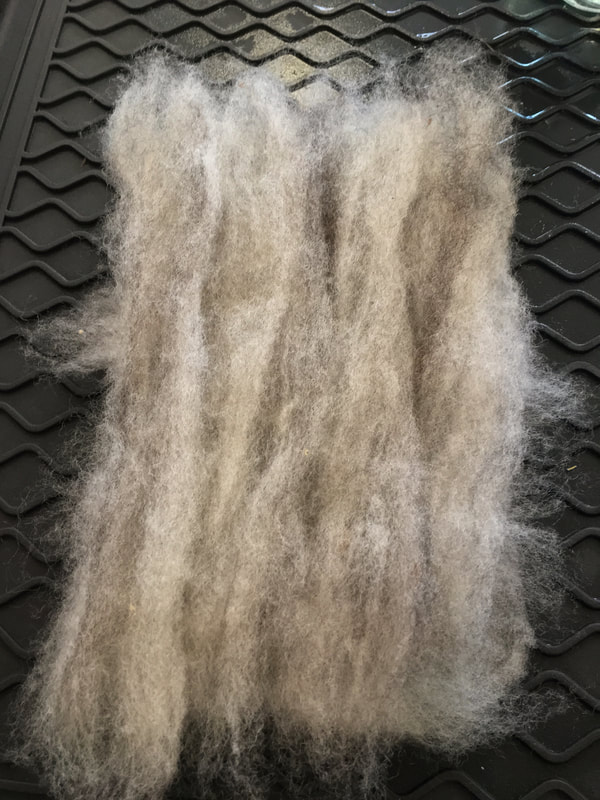 We laid our resist in the middle of our working surface (we used rubber boot mats) then we laid strands of the roving in one direction (up and down) then another layer in the opposite direction (side to side), and then a third layer (up and down). You could add another layer on top of this, if you wanted to. Doing so would create a thicker bag. But we left it at three layers.
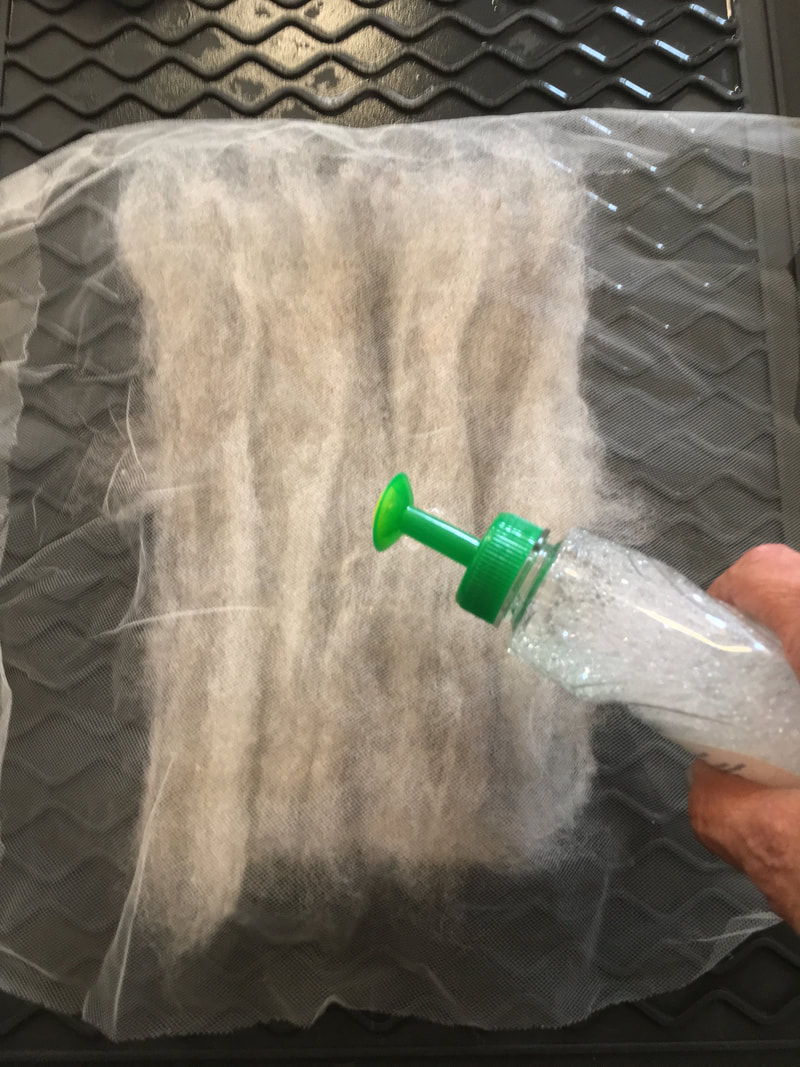
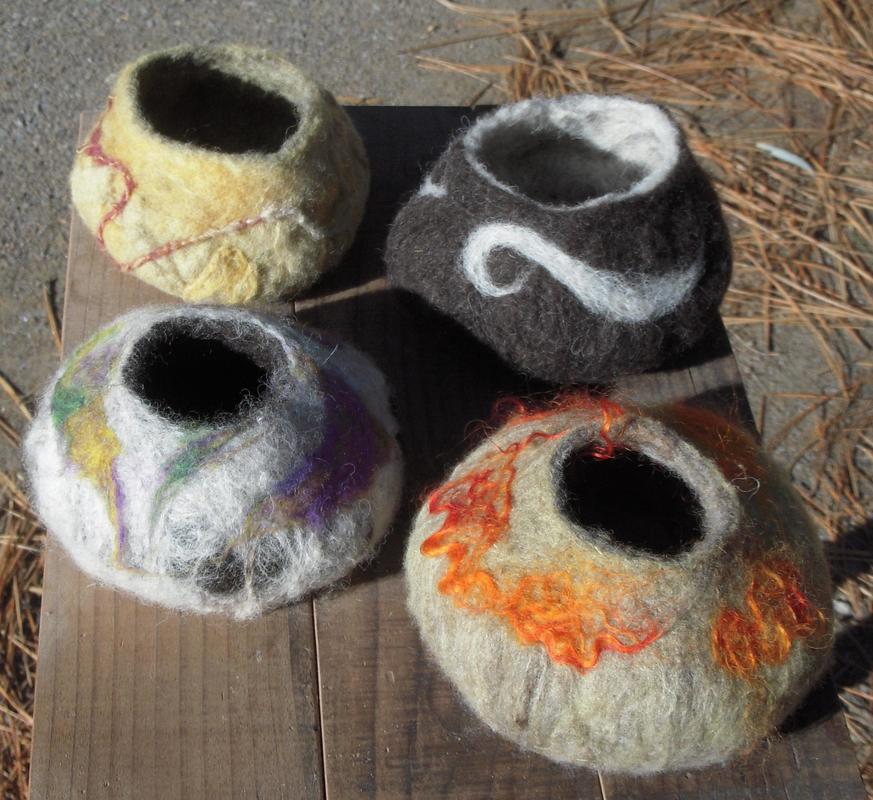
To create the friction, some people use bubble wrap, some use pool insulation, but Lorraine brought felting stones to use. (bit.ly/2MbxXyB) It's much easier on your hands. Using our felting stone directly on top of the fibers would cause the roving to shift around so we placed a thin mesh fabric on top of the roving. The next step is to add some soap and water. We used Dawn dish detergent, but you can use any type of detergent you want, including Olive soap. It's really up to you and the density of your water. Soft water creates lots of suds, harder water hardly creates suds, causing you to add more soap. 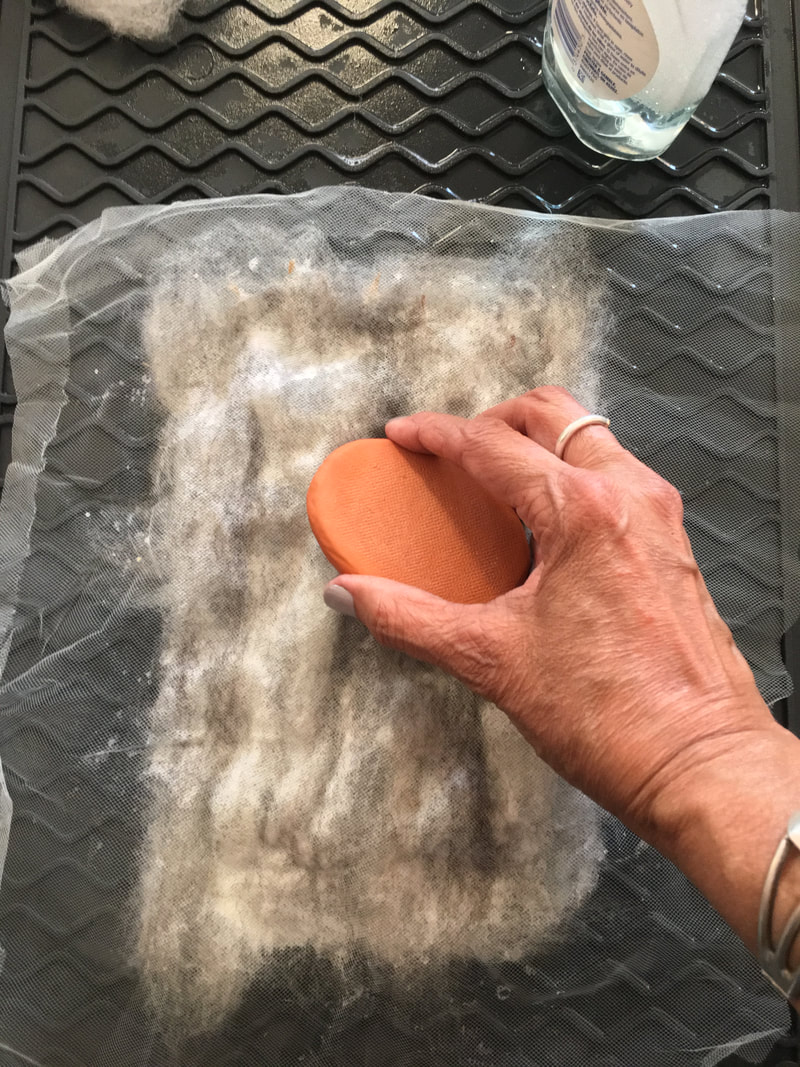 And now we work! I was amazed how little effort it took to felt the roving together. At least that's what I thought in the beginning. After 15 minutes of moving the felting stone up and down, side to side, and in circles, I was exhausted! We really worked up a sweat! "We need to come up with a felting shanty" I said. But we were all so engrossed with what we were doing, that we couldn't think of lyrics. So we all kept moving our felting stone up and down, side to side, and around in circles! Now that we've somewhat felted the back of our bag, it's time to turn it over and create the front. 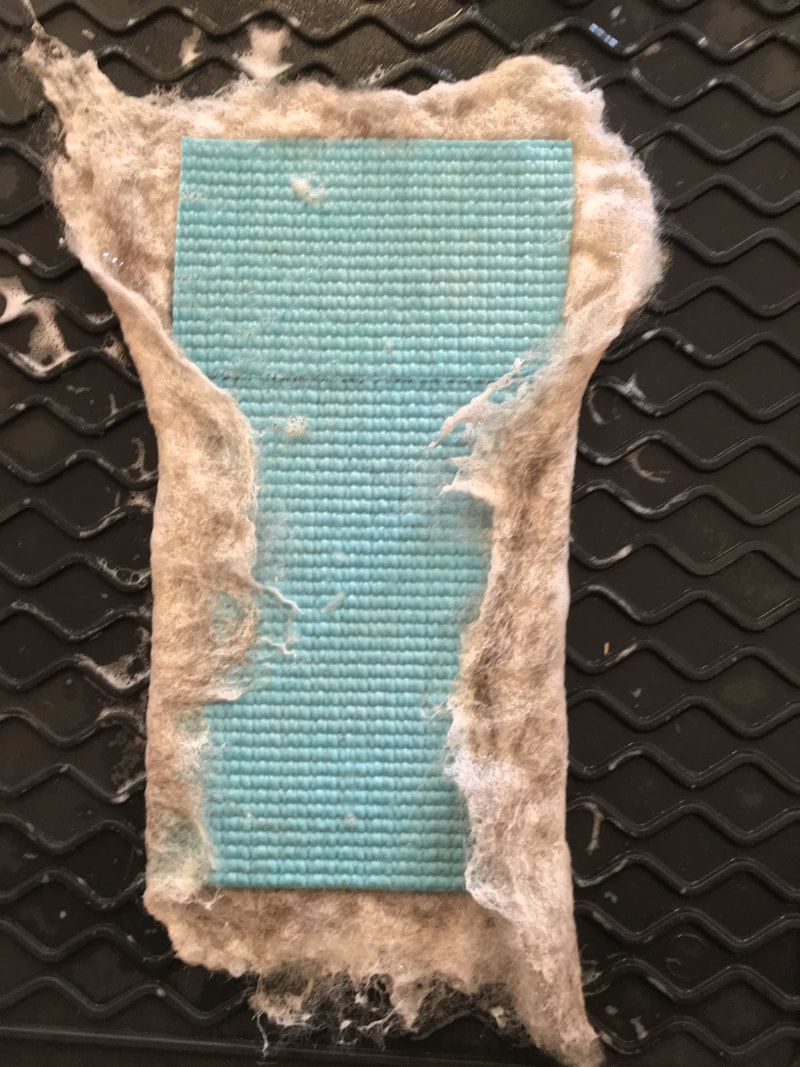 "Now remember, we are not covering the resist all the way, just to the line. The rest of the material will be your flap." 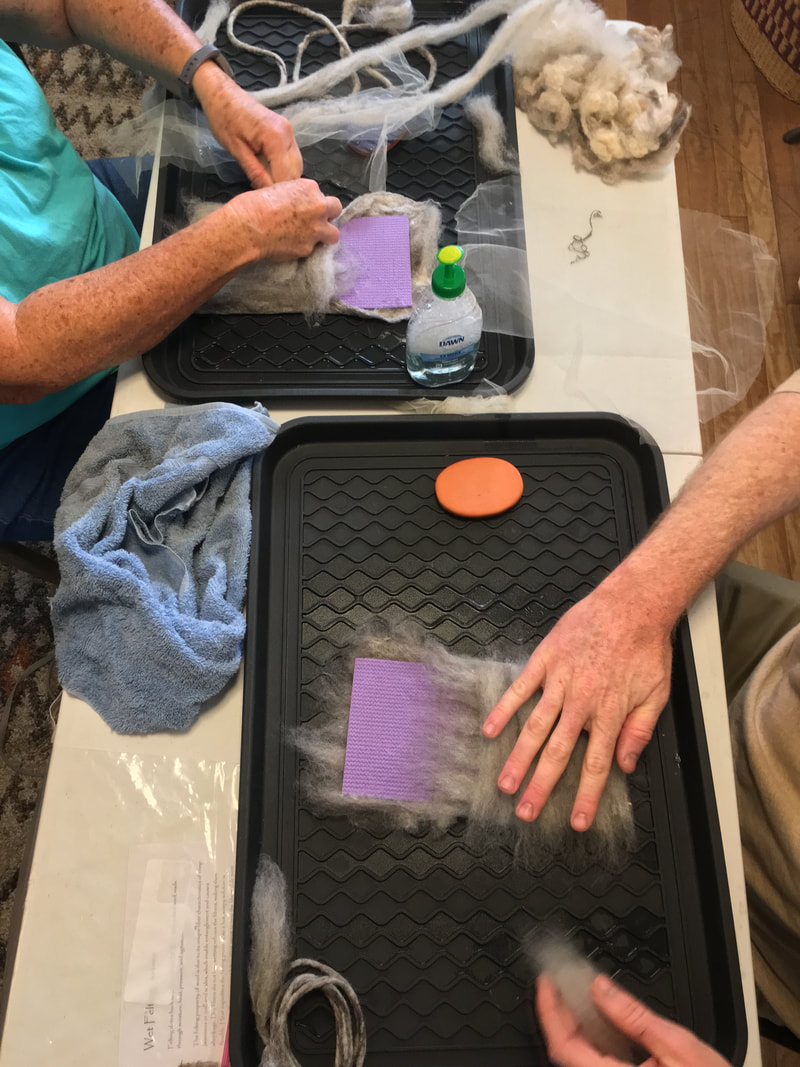 After adding three layers on the front, we repeat the process, add the mesh, add soap and water, grab your felting stone and start rubbing!. Halfway thru working the front, we placed the cord we created earlier, into the inside corners of our bag, and then continue to felt. And felt...and felt...and felt! Man this is a workout! It's now time to test our material. 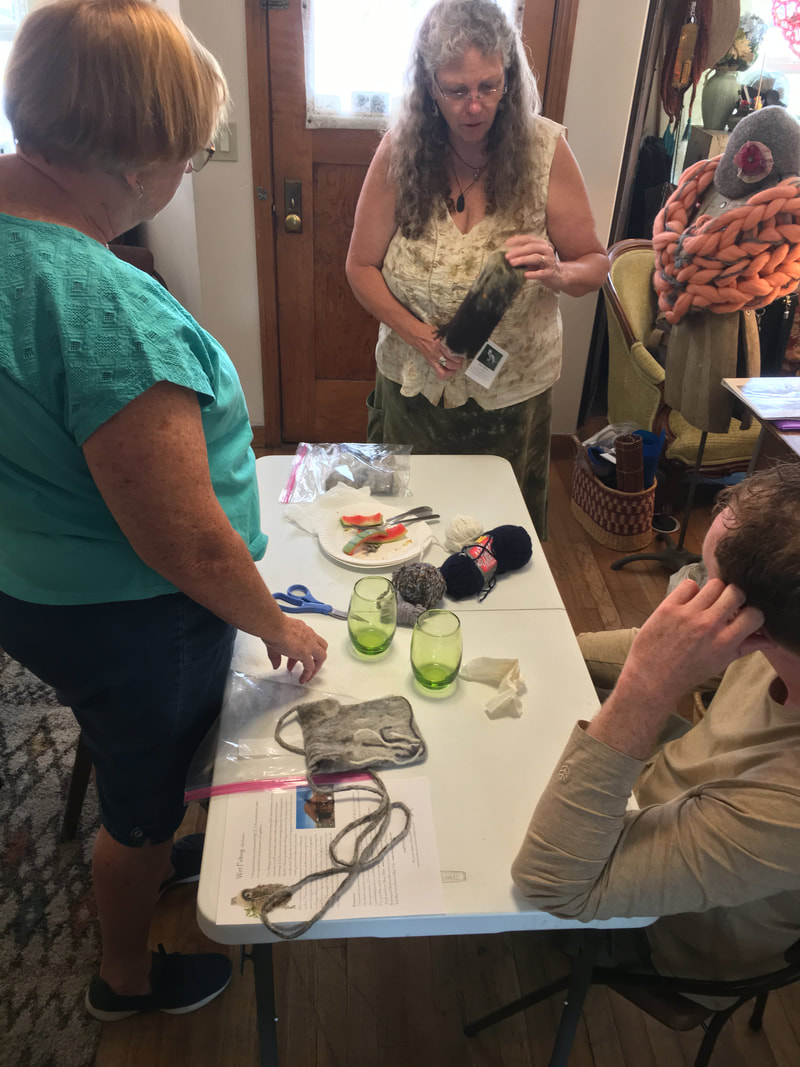 Can you lightly, pinch a piece of the top layer of your material lifting it up? Is the roving holding together? If it is, we can move on, if it isn't then its back to more water, and working the fabric with our felting stone. Our next step is to add "embellishments." Both Lorraine and I brought extra bits of yarn with us to for people to use. To add the bits, you pull back on the mesh, lay your fiber down, replace the mesh, add soap and water and rub away with the felting stone. And felt...and felt...and felt! Whew! 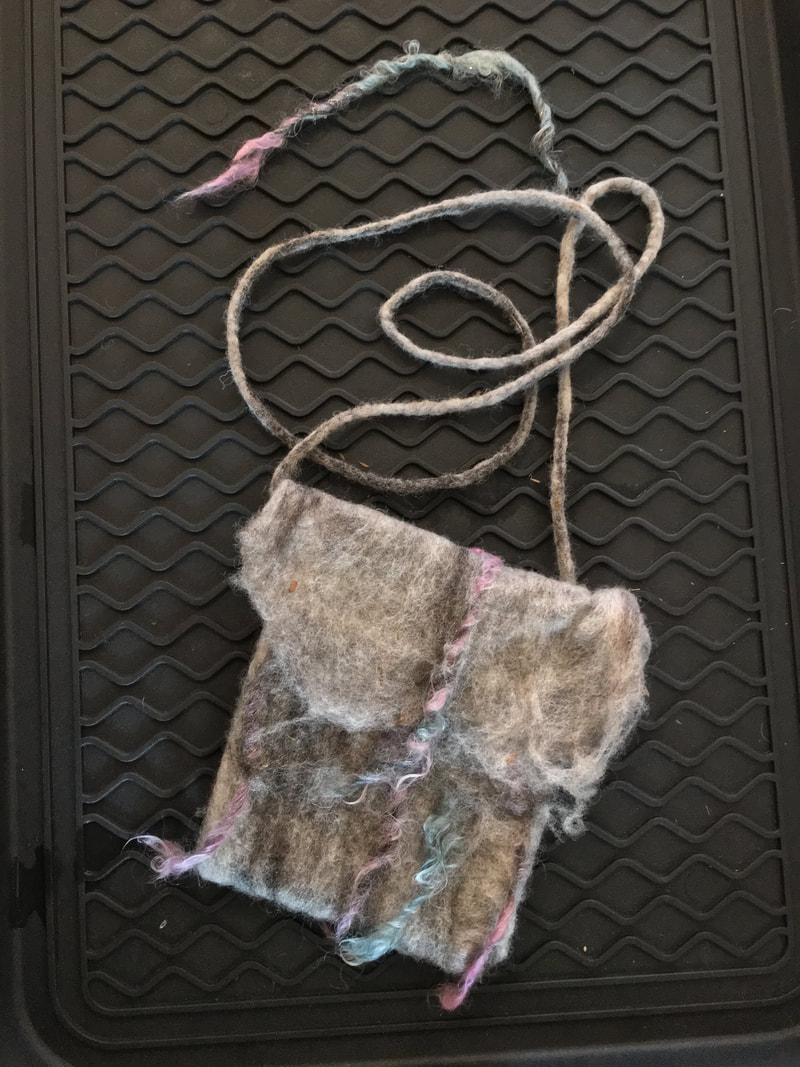 My embellishment fibers were from a little store we found in Jackson, CA a couple of years ago, One of my Faithful Sherpa's childhood friends mother passed away. "It's important that we be there for her funeral" he said. And being the fiber girl that I am, I looked up yarn stores in the area. Beautiful handspun yarn found at Hole Affair. Unfortunate for us, the store is now closed. Ginger, the owner, decided to finally retire, and go skydiving. . .at age 75! You go Ginger!! So I added it to my bag, but for some reason, it wouldn't felt into the fabric. Even though I rolled, and pushed and pulled my felting stone across the material one hundred, thousand, million times, it didn't felt together.  "That's ok, you can always needle felt the embellishment to your fabric" Lorraine said. She's so smart! So after spending 2 hours felting, and felting, and felting some more, we were done. In the end, we each had a beautiful bag, we individually created using roving from Madelina, the Jacob Sheep from Vacaville! 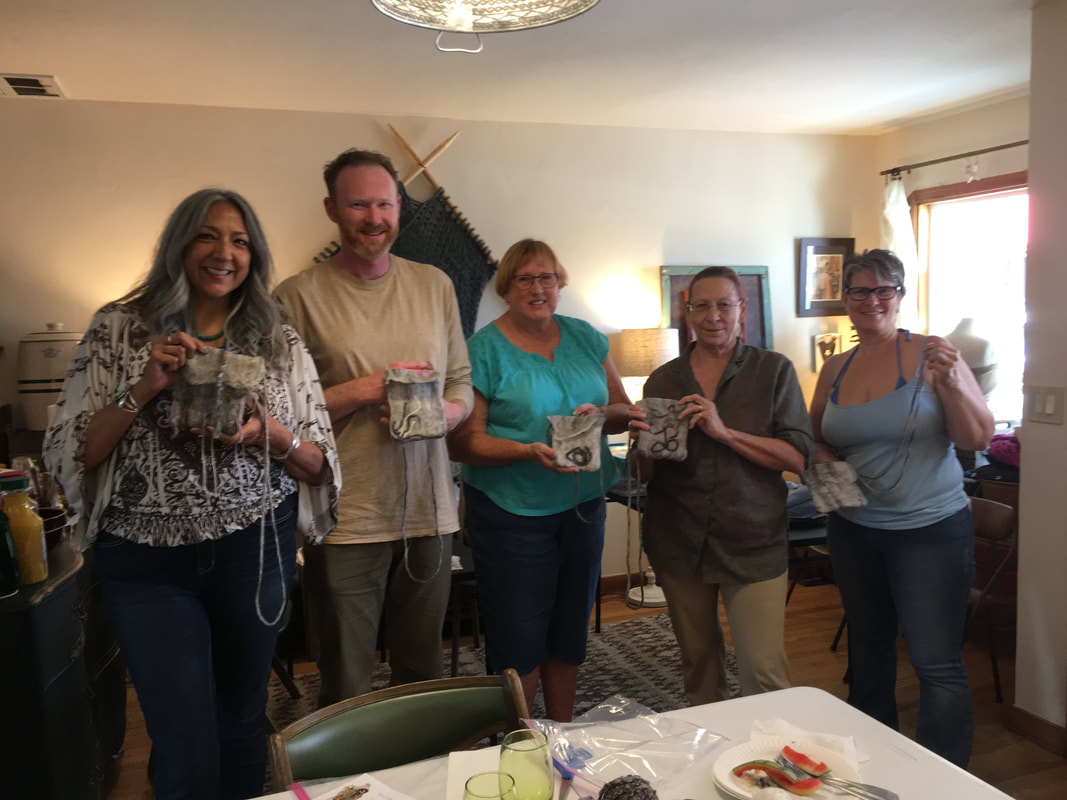 Eva, Lucas, Cindy, Ann and Tammy showing off our bags! I was tired, but I loved the entire process, from start to finish. I love the fabric that we created, and the bags that we made, Even though we all started out with the same materials, and concept, I just love how we all ended up with something so completely different! Thank you, Lorraine for teaching us an incredible skill! Lorraine will be teaching two more classes this year. Sign up quickly, though. Classes are limited to 6 students!
2 Comments
Cheryl
8/14/2018 07:51:15 pm
How fun and exciting for you to learn all about felting. Your bag is beautiful. I really enjoyed your blog......
Eva
8/14/2018 07:56:05 pm
It was so much fun and I can’t wait for our other events! Leave a Reply. |
Archives
August 2023
Categories
All
|

 RSS Feed
connect
|
Josefina Fine Knits
PO Box 172
Crescent Mills, CA 95934 415-497-7514 
|
NEWSLETTER SIGN UP |